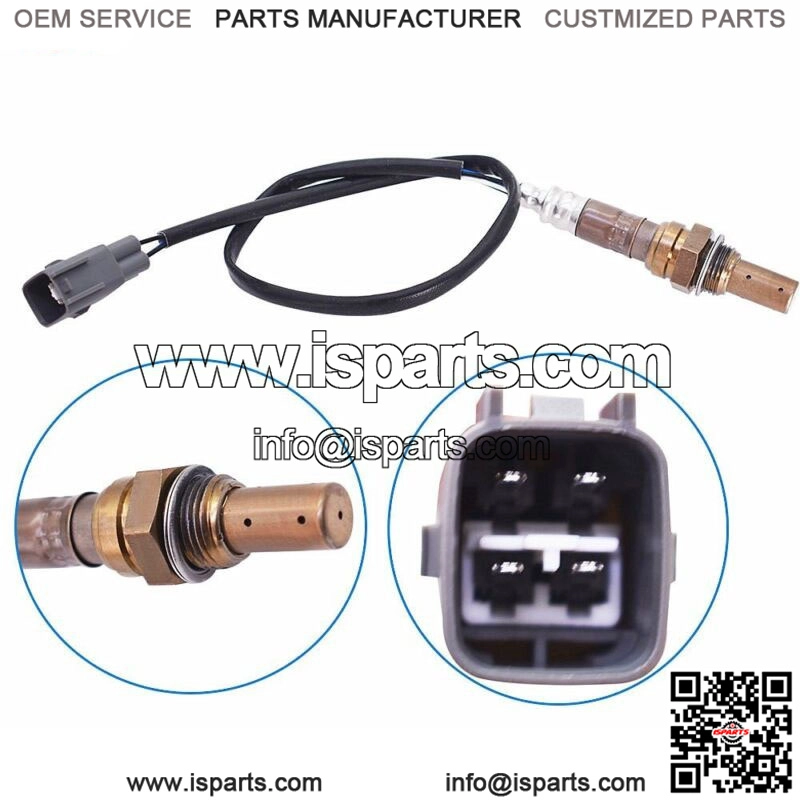
Upstream For 2001-2004 Toyota Sienna Avalon 3.0L Air Fuel Ratio Oxygen O2 Sensor
Description
Please check fitment notes & description for accurate information. 2000-2001 Lexus ES300 3.0L
2000-2004 Toyota Avalon 3.0L
2001 Toyota Camry 3.0L
2001-2003 Toyota Sienna 3.0L
2001-2003 Toyota Solara 3.0L Oxygen Sensor’s Location: How do I know the O2 sensor is good or not
Check engine light on
A reduction in fuel economy.
Your catalytic converter fails unexpectedly
Exhaust emissions reach undesirable levels.
How to install the oxygen sensor Step 1 – Some sensors are equipped with a heat shield that must be removed before the sensor removal, this is performed by removing any mounting bolts. Step 2 – By using a regular socket it minimizes potential damage to the sensor body and the threads, this technique helps avoid stripping the old sensor upon removal. Step 3 – Then, locate and disconnect the wiring connector, this step should be done before removing the sensor if the wiring is still attached. Step 4 – Its important that the wiring harness connectors are exactly the same, each sensor is unique to it’s position and is located in the system by its connector configuration. (Note: some replacement sensors have a universal electrical connector that must be configured to the wiring of the old sensor.) Step 5 – Use a small wire brush to help clean the threaded port to ensure a proper seal of the new sensor. Gently install the new oxygen sensor by hand while keeping the wiring and connector free from bends. Step 6 – Gently tighten the sensor while keeping wiring free from damage, these sensors need to be fairly snug to avoid leakage. Step 7 – Once the sensor is tightened, reinstall any heat shields or bracing that had to be removed. Step 8 – After the heat shield has been reinstalled, mount the connector to it’s holder and reattach the connector back onto the wiring harness. If the car has diagnostic trouble codes, they will need to be cleared. Must Know Before Buying: The following information is for instructional and guidance reference only. We try and make them as accurate as we can. If Check Engine Light is on or an OBDII Trouble/Fault code occurs after installation, check the sensor with a voltmeter as below.
If the sensor is good, further diagnosis is required. There’re many different codes for specific functional failures, which are NOT necessarily relevant to the sensor. Find out what the Code means before leaving any feedbacks. Items that have been installed, altered or contaminated are non-returnable. 1. ONLY a defective sensor after tested by a voltmeter is applied to manufacturer warranty.
2. 20% restocking fee is required if buyer bought wrong items due to not paying attention to fitment information and ask for return. The Price, Quality & Functionality of the O2 Sensor is fully covered under our warranty & return policy. However, refund for any labor cost, expense in a dealer shop or damage due to wrong installation is NOT covered.